Trinity Killian.

Do you have clothing in your wardrobe you no longer wear? Or is it just a bit boring and you crave novelty?
Then this article is just for you! Join me as I show you how to create cool patches at home with just a few supplies.
1. Gather scraps
First you’ll need to locate some scrap fabric you may have lying around your house. If you don’t keep scraps or have an old piece of clothing to cut up, you can find used bits of fabric (or damaged garments) at your local charity shop. Charities will bag up clothing they can’t sell and keep it in recycling bins, so it’s always worth asking if they have any bags ready for recycling. Don’t forget to donate some loose change in case they dig up something for you!

Once you have chosen your fabric, you’ll need to cut it into smaller pieces. Shape is not important, but I usually start out with squares and rectangles. Keeping it simple makes your job easier once you get to the sewing portion of patchwork.

Material doesn’t matter too much when it comes to choosing which fabric to work on, but speaking from experience – thinner cotton or fake leather are the easiest to paint on. Thicker types of fabric will require multiple coats of paint and a bit of patience. Avoid anything too stretchy! Painting on stretchy fabric could result in paint not sticking properly and eventually flaking off. The stiffer, the better.
2. Supplies

You will need: needle and thread; fabric paint (or multipurpose acrylic like I have in the photo); old white eyeliner or regular soft white pencil, white chalk also works; brushes, and a black permanent marker (not pictured, oops, sorry!).
As you can see, the supplies you need to create patches are very inexpensive and you can find them in your local craft store or even some supermarkets. I’m positive that some of these things could be hidden in a junk drawer at home!
3. Getting started

Grab a piece of fabric from your scrap pile and sketch out your design with a white pencil (or chalk). The good thing about using a pencil or chalk is that you can wipe it off if you’re unhappy with your design and start over. Look for inspiration on Pinterest or see what other artists are selling on Etsy. Remember: do not copy original art! Try to come up with your own and if you really like a specific illustration, support the artist directly. This of course doesn’t apply to band logos, that’s a completely different thing.
In case you want to save time and energy and want to focus solely on band logos or simpler designs, Anarchostencilism will be your best friend. Their stencils are categorised by music genre and type of design, so it’ll be easy to find your favourite bands and other music-related graphics. Just print them out at home, cut them out, place them on a piece of fabric and apply paint.
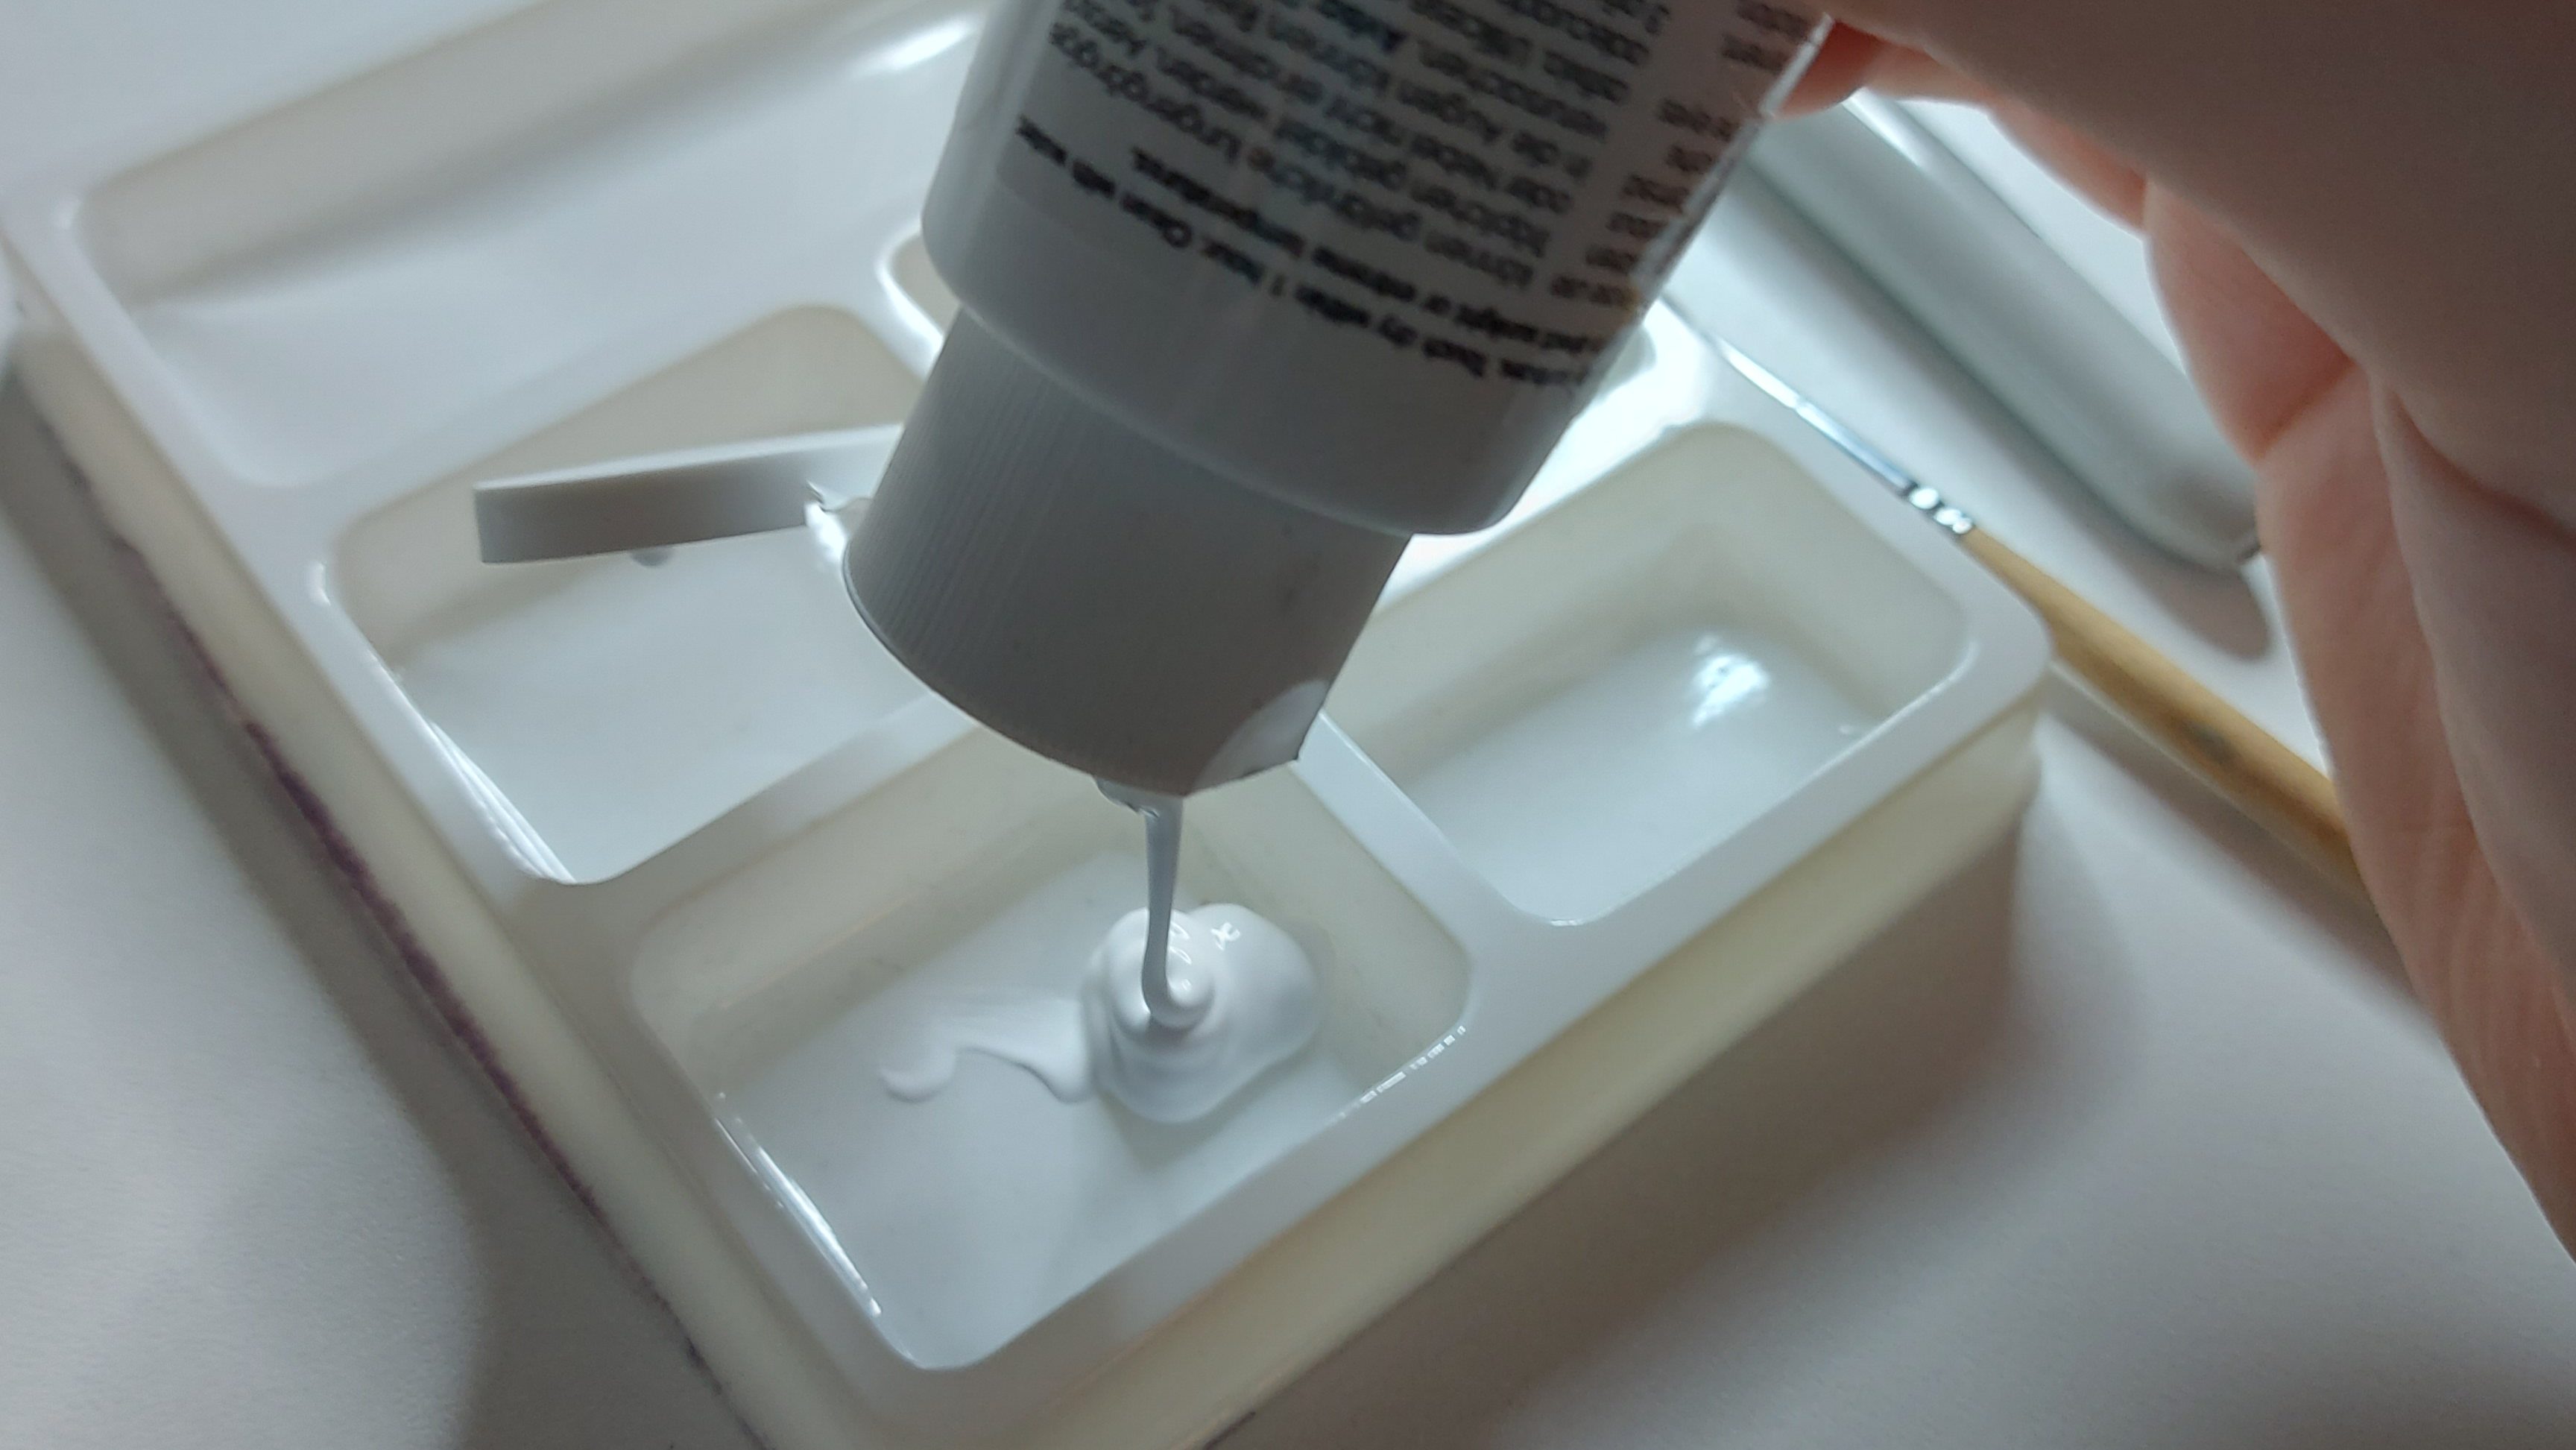
Once you’re done sketching, squeeze some paint out into a plastic tub or on a piece of cardboard and fill out your design. Don’t worry about making it perfect, any mistakes can be cleaned up afterwards.
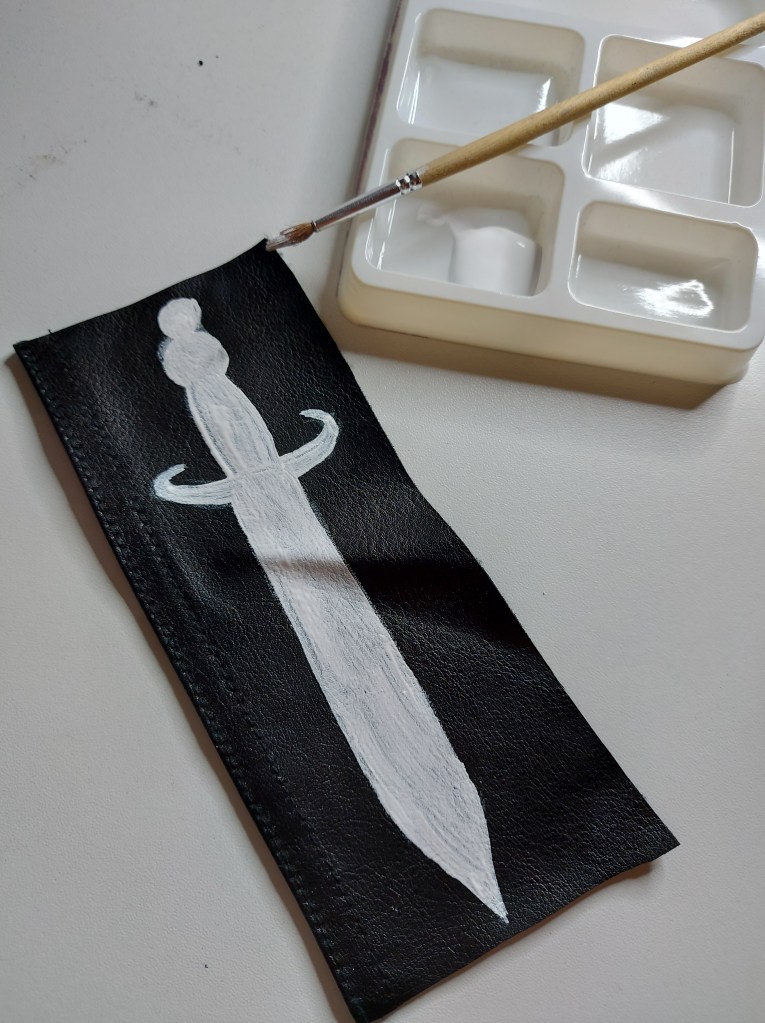
When you’re done, let the paint dry. If you’re impatient (I know I am), you can speed up the process with a hairdryer. You know you’re good to go when the paint doesn’t stick to your fingers. Next step is cleaning up your design with a black Sharpie and adding all the details.


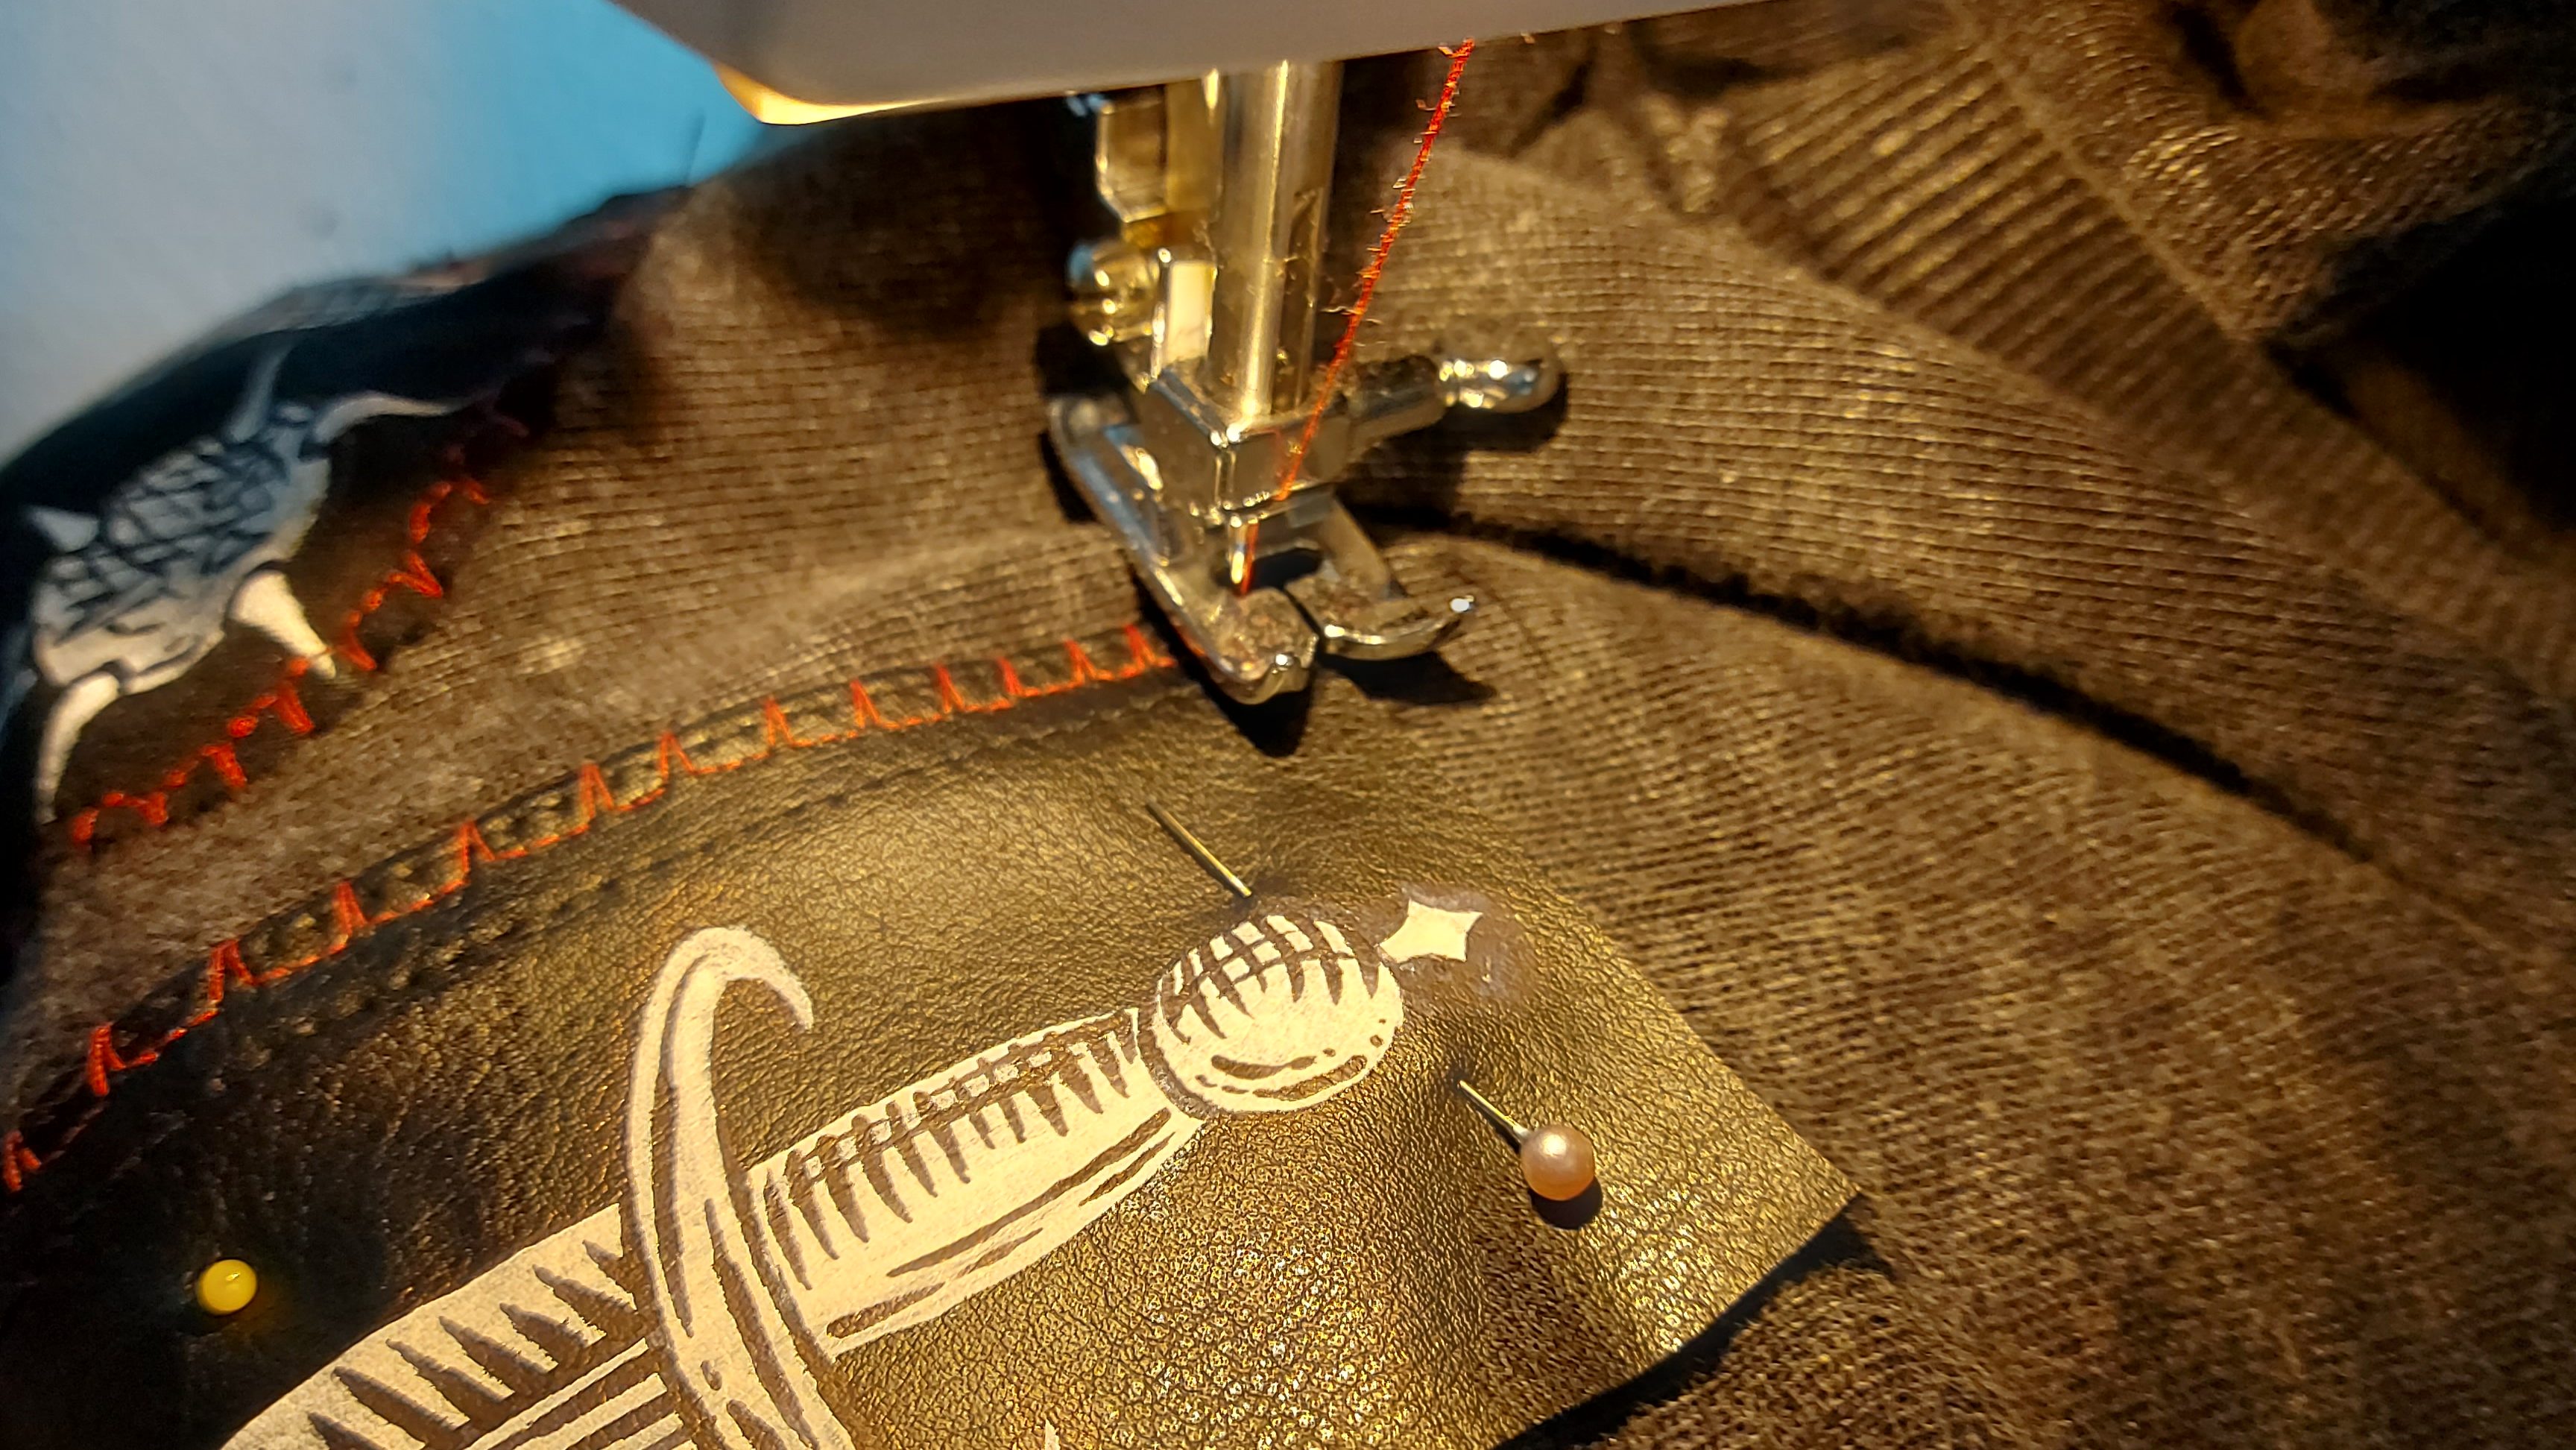
I’m a big fan of medieval imagery and engraving art style, so here are my patch designs! Each one of them was first sketched out, blocked out with white paint and then I added all the details with a black permanent marker.
Before we move onto planning out the placement of your patches and sewing them on, you will need to iron over your designs to ensure they last. To avoid the possibility of white paint getting stuck to your iron, place a sheet of baking paper on top and then iron over the image on high heat for one minute.
4. Planning and sewing

Once you have played around with different placements and figured out where you want your patch to be, secure it with sewing pins so it doesn’t move around as you sew.
There are multiple options as to how you can attach your patches: hand sewing; machine sewing, or fabric glue. I personally wouldn’t recommend using fabric glue, because there is always the risk of it falling off in the wash. I will be using a sewing machine to save myself time and energy, but if you don’t own a sewing machine, you can look for videos online that show you different hand sewing techniques. This video from Madi Danger shows you how you can hand sew patches at home.
5. Washing instructions
Regardless of what type of paint you use, I would always recommend hand washing hand-painted patchwork items. If you really need to put your clothing through the wash, turn it inside out and use the lowest setting available. Putting it inside a washing bag also helps minimise the amount of friction on the design and helps it last longer.
TA-DA!

You are done! Enjoy your new upcycle project.

Leave a comment